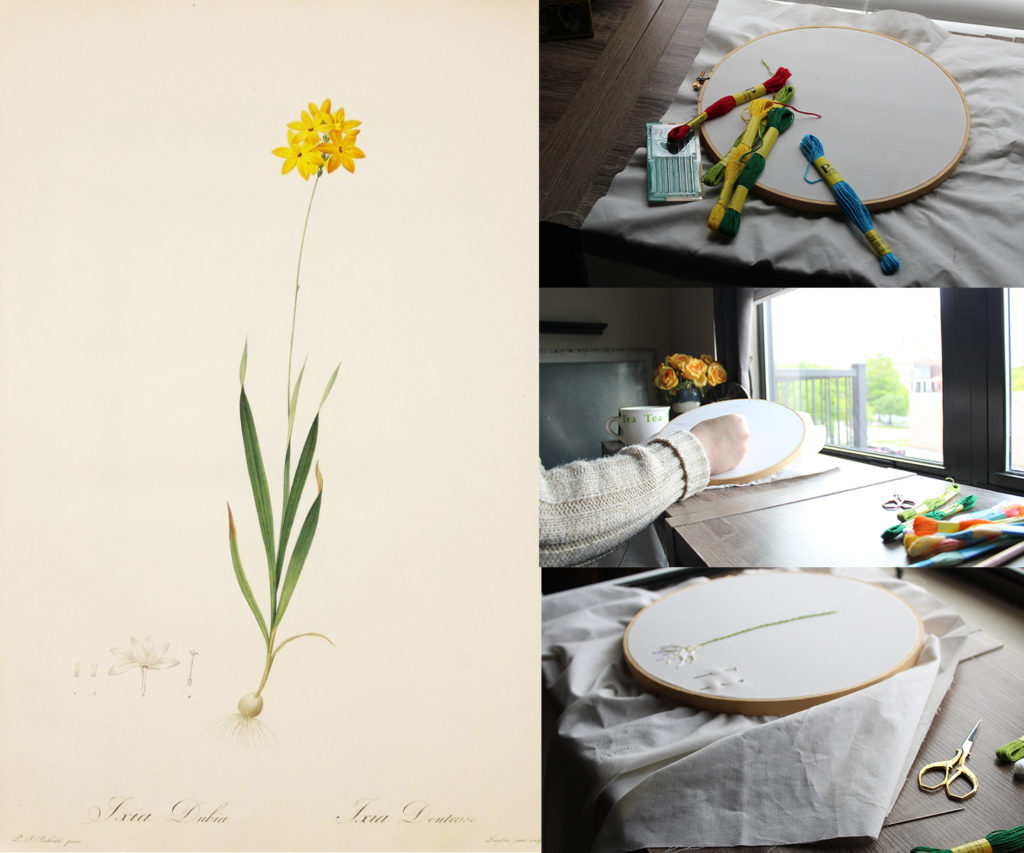
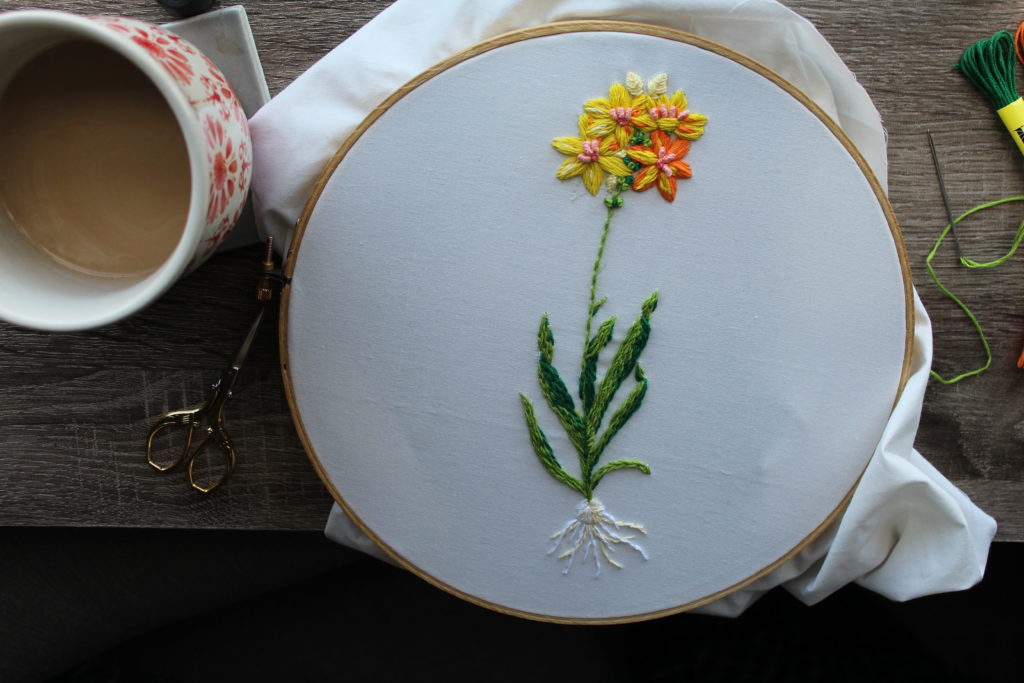
At the McClung Museum, we’re holding onto summer with this embroidery pattern based on Ixia Dubia, Plate 64 from Les Liliacees, Vol. II, a print by Pierre-Joseph Redoute from the McClung Museum’s Nature Print Collection. The yellows, orange, and dashes of pink embody the freshness and joy of Redoute’s print.
Want to create your own? Take a look at the instructions below or download them in the pdf pattern. Each month we will share an embroidery pattern based on our collections. Stitch with us, ask questions, and share your progress!
Download our first #StitchTogether tutorial sheet!
Want to suggest a piece from our collection for a future embroidery pattern? Explore our online collections and send us an email at museum@utk.edu.
New to embroidery? Find all the links to videos of each stitch in the pdf and below.
Supplies:
- embroidery needle
- hoop (10-inch diameter hoop used)
- a piece of fabric or clothing
- scissors
- pencil
- embroidery floss:
- 2-3 yellows (light, bright, and dark — I used orange, because it is what I had)
- 2 greens (light and dark)
- White or light grey
- 2 reds (light or pink and dark)
Instructions:
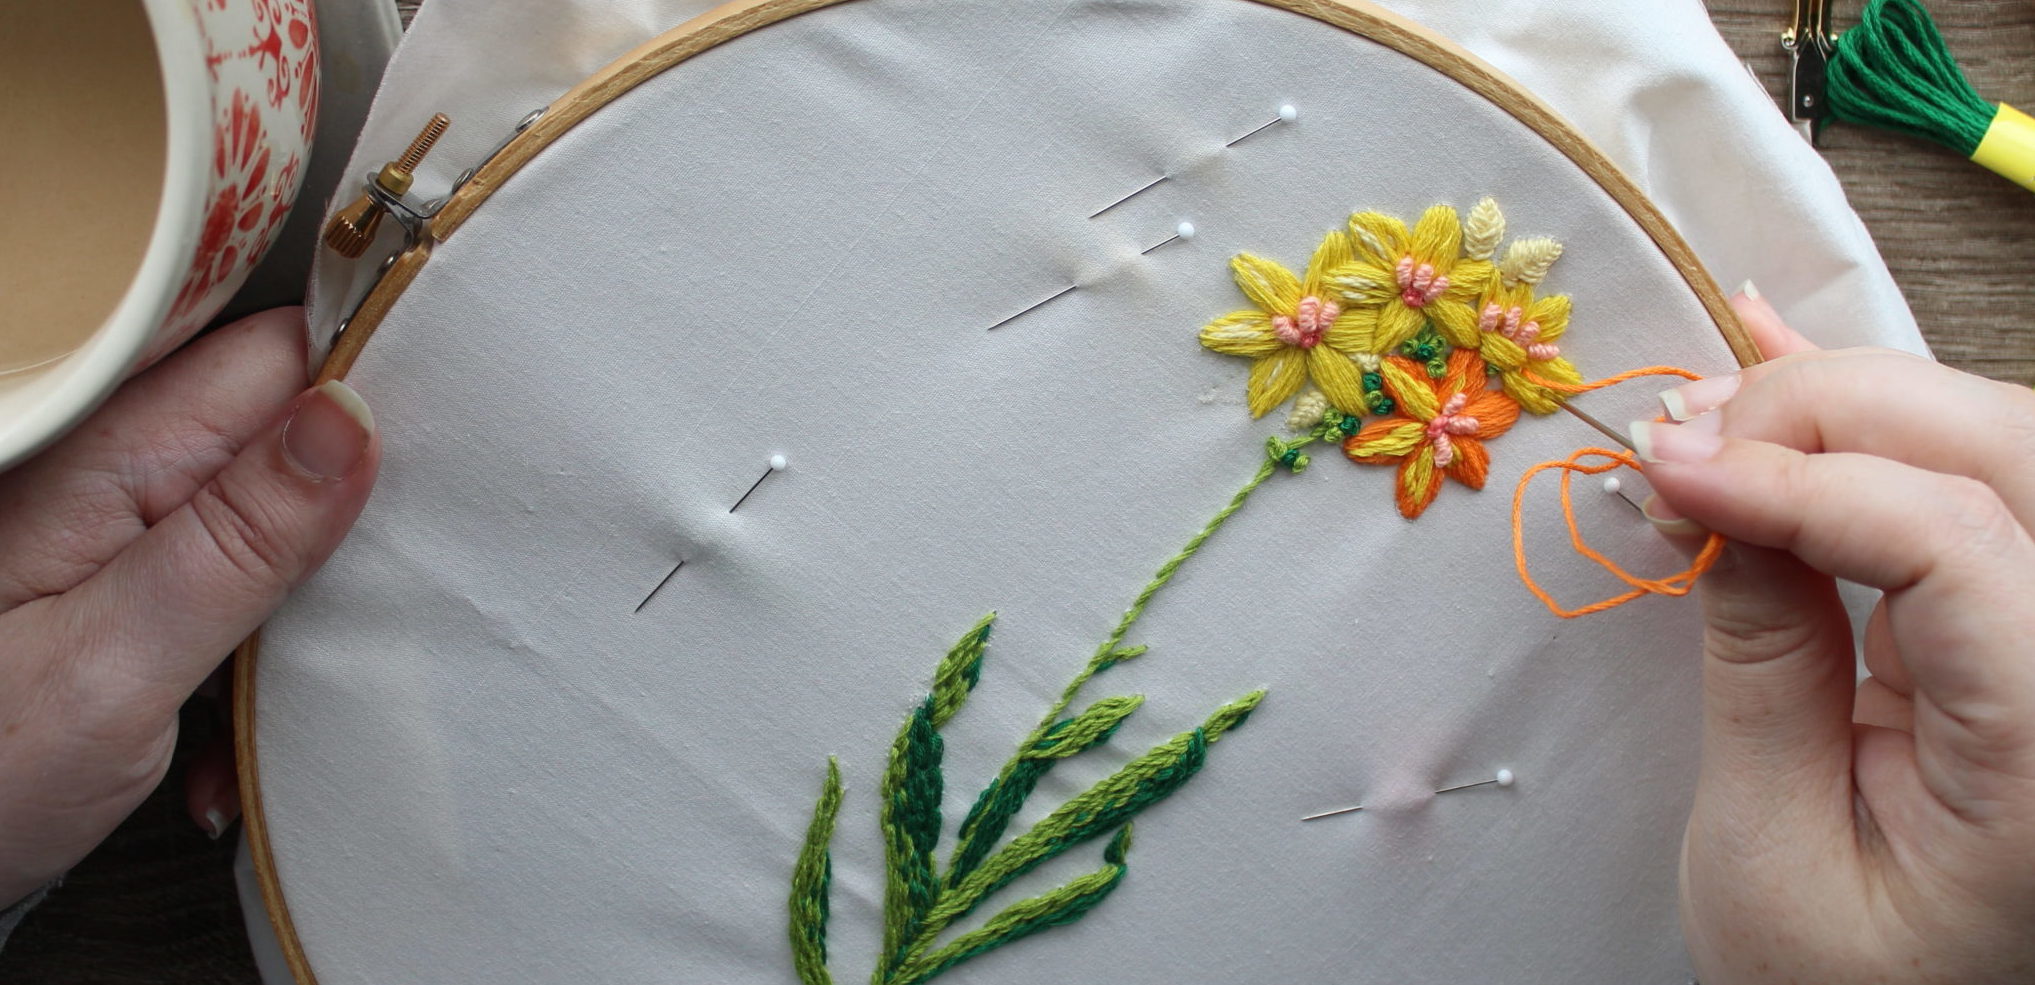
- Place fabric on the hoop making sure the fabric is taught.
- Draw or trace the design onto the fabric with a pencil.
- Thread your first color onto the needle and begin stitching using the colored guide from page one.
- You can start anywhere, but save the highlight and shadow lines for after the petals are complete. Lastly, stitch the flower pistils.
- Sit back and take in your awesome work! 🙂
Stitches:
- Outline stitch
- Stem
- Roots
- Variation– Stitch lines side by side to create full leaves.
- French knot
- For the flower center (dark red), wrap the needle three times.
- For the new growth nodes (green), wrap the needle once or twice.
- Straight stitch
- Flower petals
- Bulb
- Half hitch stitch
- For flower pistils (light red), wrap the needle 6 or seven times.
- Leaf stitch
- Flower buds